mein PLATZ offers a fine selection of motorhome / motorhome parking spaces and Campsites from 10 European countries. Authentically, extensively and competently presented.
Go to a route on www.mein-platz.com and scroll down to get to the “Follow in Google Maps” button and then click it.
This will take you to a new tab with the view of the route on Google Maps.
Step 2:
View the route in the Google Maps app.
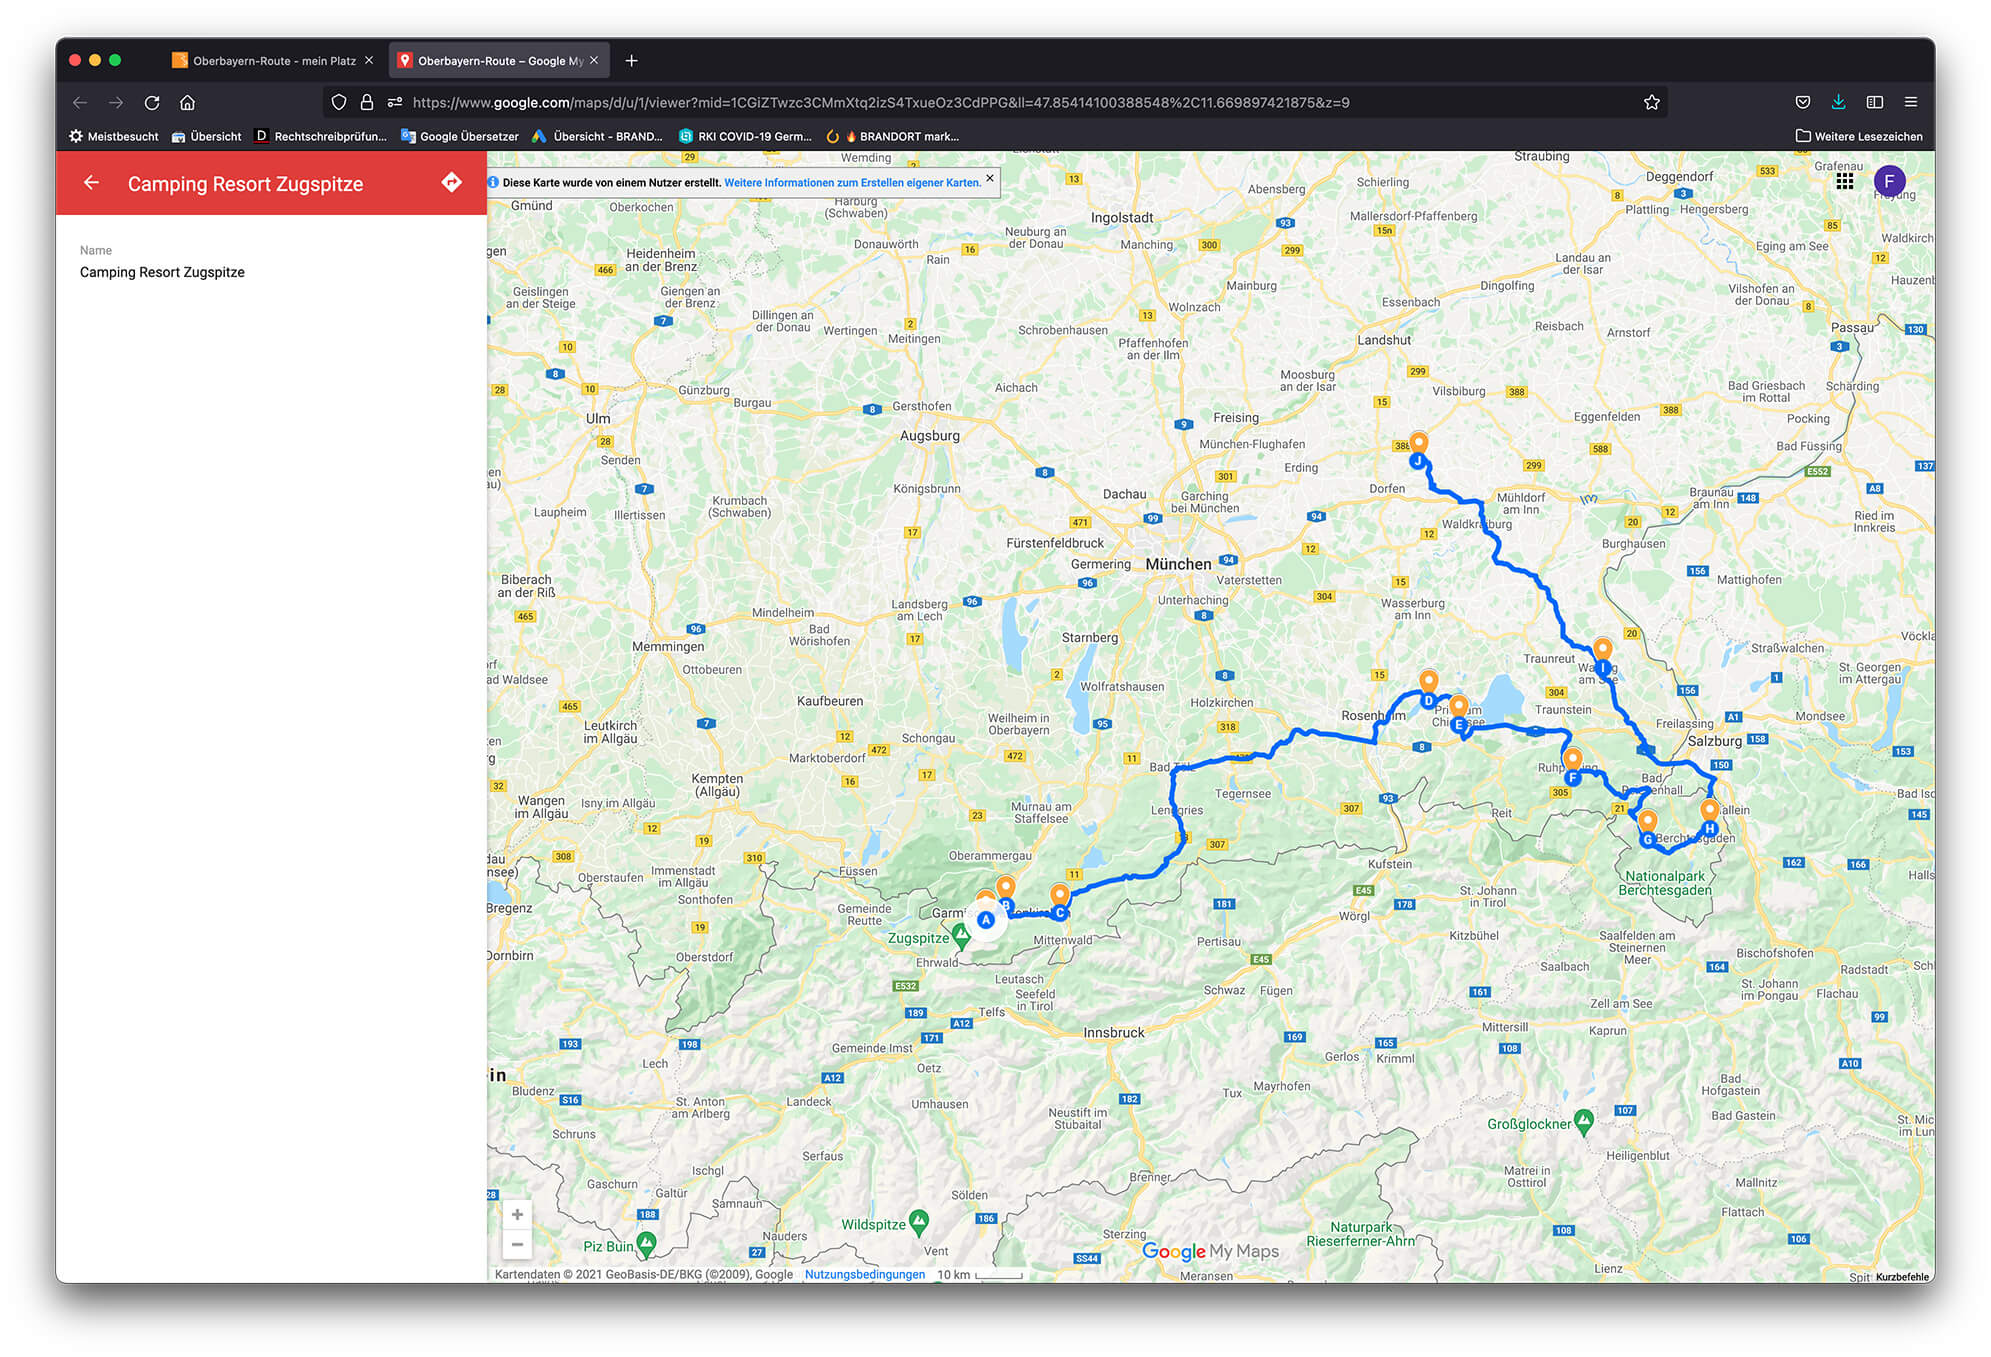
Here you can select the starting point of the route. With two fingers you can zoom in closer to the individual points in the app.
Information about the courses can be accessed via the orange pins. The blue letters can be used to select the starting point for the journey.
Step 3:
We have chosen the letter “A”. In the left pane comes new information:
– Point name
– A small shield icon with an angled arrow. This icon can be used to start route planning.
We want to start the route planning, so we press the “sign icon”
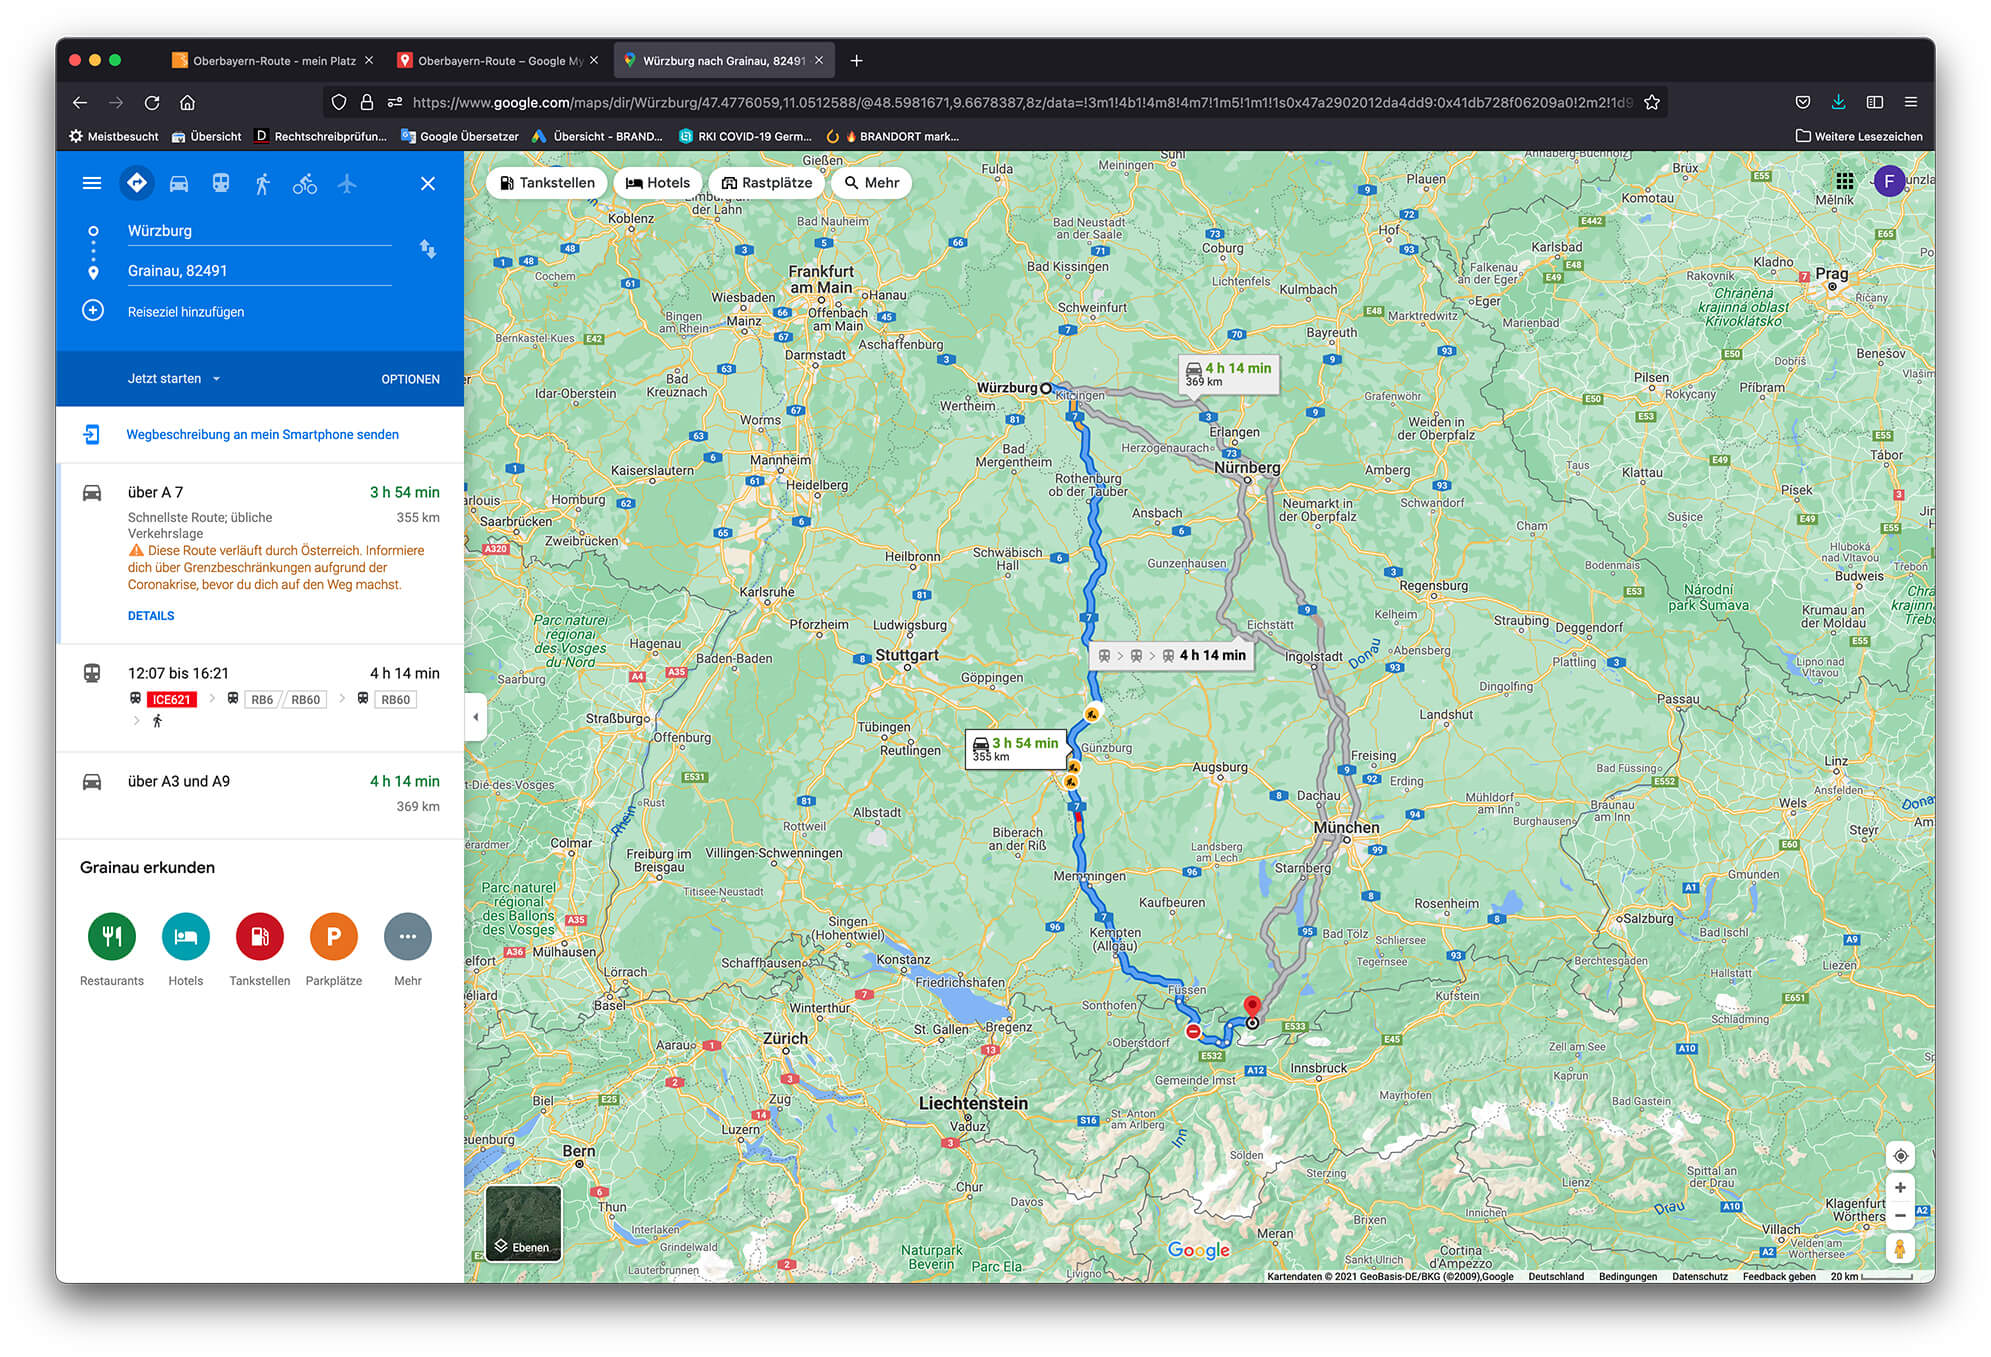
Step 4:
The usual Google route planning comes to view. The usual settings can be made here.
In order to send the route to our navigation device and open it in the GoogleMaps app (it must be downloaded and installed beforehand), we must click on the phrase “Send directions to my smartphone” under the blue box.
Step 5:
A pop-up window will now open in which an e-mail address can be entered. The link to the route will be sent to this email address.
This email address should be retrievable with his smartphone/tablet, with which one wants to navigate.
If you are already logged in to Google, the email address of your Google account will automatically appear in this field.